

How To - Single Loch Ness Minnow Musky Fly - Redhorse Sucker
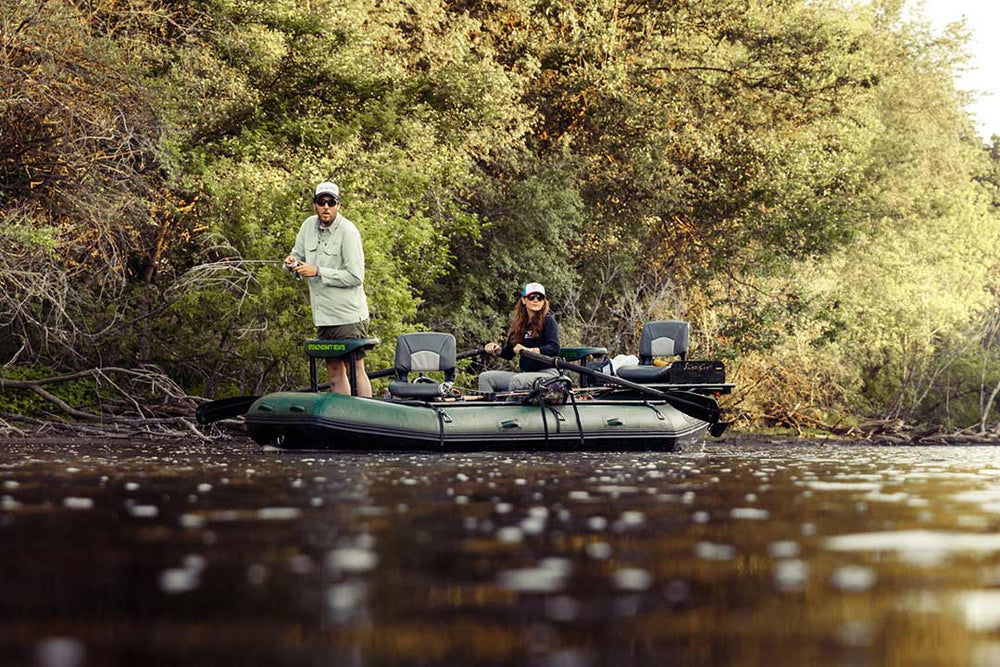
Up here in the Midwest we are all hunkered down with not much to do but dig holes in the ice and tie flies…lots of flies. Starting today we will do a musky fly feature each Friday of February and March highlighting the material list and recipe for some of our favorite musky patterns.
We will start things off with a classic staple in our box throughout the season - the Single Loch Ness Minnow in redhorse sucker. Inspired by the Hang Time Optic Minnow from Brad Bohen, the Loch Ness Minnow is an easy to tie, fishy pattern that works great all season long, but especially in spring when you need to size down. It is neutrally buoyant, lightweight, and provides a subtle kick left and right on the strip with that nice slow hang on the pause. The single pattern is tied on one 6/0 hook and comes in at 6-8 inches in length. You can check this finished fly out at the link here.
List of Materials:
-
Bucktail: Red, Light Olive, Olive, & Brown
-
5-7inch Schlappen in Fiery Brown
-
Long Red Grizzly Saddle Feathers (Long, flexible Schlappen feathers can work too)
-
Holographic Flashabou Magnum - Sunrise
-
Krystal Flash - Root Beer
-
8.5mm Living Eyes - Earth
-
Loon Outdoors UV Clear Fly Finish - Thick & Thin
-
Ahrex PR320 6/0 (PR350, TP610, Kona BGC, and many other 5/0 or 6/0 hooks work too).
Recipe
-
Start by building a thread base along the full shank of the hook.
-
Cut a pen sized clump of long red bucktail and tie it in standard way (tips pointed to the back of the hook). I tie this first clump in on the hook shank so it is in line with the hook point. The goal with this section of bucktail is to tie it down to be fairly narrow so it acts as a rudder and keeps the next set of materials (feathers & flash) from getting fouled on the hook.
-
Tie in one fiery brown schlappen feather on each side of the bucktail (tips pointed to the back of the hook). I try to use the full 5-7 inches of the feather and make sure they are tied in to lay flat on each side. This aids the rudder effect of the tail.
-
Tie in several saddle feathers. If you have really thin feathers I would use at least 6. If you have thicker, webby feathers you can use just 3. You want to tie the feathers in on each side and on the top (tips pointed to the back of the hook). These feathers will create the length of the fly, so try to have at least 5-6 inches of feather draping off the back of the hook.
-
Cut 15-20 pieces of flashabou magnum sunrise and tie it in on top of the hook shank. I try to keep the flashabou to be just a bit shorter than the length of the longest feather. I also taper the strands before tying in so they are all a bit uneven.
-
Add some glue to the thread to really lock everything in.
-
Reverse tie long light olive bucktail. I grab a pen sized clump and try to tie it in 1/8 to a 1/4 of an inch in front of the first section of material. To achieve a nice taper I tie this one down to be fairly narrow but just slightly less narrow than the tail section.
-
Add in 10-15 strands of root beer krystal flash. When I tie in the krystal flash I try to halo it around the light olive bucktail, using my thumb and thread pressure to spread out the material.
-
From here, it is all bucktail reverse tied to the head each about a pen size diameter. I start with brown and alternate between that and olive. On a single hook pattern the order will be brown-olive-brown-olive-brown, leaving a 1/8in or so near the hook eye to finish the head. Each bucktail wrap should get less and less narrow to achieve the proper taper and water pushing effect. If you want to elongate this pattern to a double or articulated size, just add the extra shank or hook in front and keep reverse tying bucktail in the same order until you get to the head.
-
Once I am done tying in material, I do several whip finishes and add glue to tighten it all down.
-
I add the eyes by using a decent size drop of UV Fly Finish thick. Once they are secured in and cured I slowly work my way around the head with the UV Thick to achieve the right head shape. I go over the head at the end with UV Fly Finish Thin to fill in any holes and make it a smooth head finish.
-
Done! Time to fish!
If you have any questions, feel free to drop them in the comments or shoot us an email at shop@muskyfool.com. Have a great tying season!
Leave a comment